10 months ago my wife brought home a box from Harbor Freight Tools. Inside was a kit to build a 4 x 8 collapsible trailer frame. She shared this grand idea of building our own teardrop trailer, to take on a cross country road trip we have always talked about. With her research and a little of my own we altered the collapsible frame design into a rigid base. Then built a wooden floor base. Within a few weeks of occasional weekend work we insulated and waterproofed the base, but then we abandoned the project for the winter.

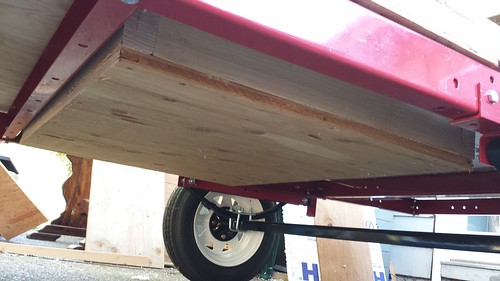


With less than 6 months from our scheduled departure we jumped back into action in April of this year. Finally attaching the wooden base to the metal frame. Which took all of three hours. Next we decided on a shape, then cut out and installed the side walls. I found some scrap laminate flooring for free from a neighbor that was just the right amount to cover the floor. Next we had to cut off the galley from the cabin. I am 6ft 4in so I had to lay on the floor and had my wife measure my dimensions to be sure my feet and legs would fit under the galley counter. We considered building a shelf for our dogs to sleep on, but realized that would require placing the side doors too far forward. So we scratched that idea and started to frame the walls of the galley kitchen. My wife picked up the smallest mini fridge she could find on craigslist a we framed the shelving around it.


Next was the rear hatch. This was not fun. The exaggerated curve we added to the trailers rear end provided unnecessary additional challenges when attaching the skin. If we could do one thing over it would be to end the bottom of the door at less of a curve. We had to soak beach towels and drench the wood and spent several hours struggling and risking breaking expensive building materials. We also used way more staples than would have been necessary with a better shape and maybe some cargo straps. But hey its supposed to be that cute teardrop shape right?


We ordered our side doors from Frank Bear @ teardropparts.com and found a “Fantastic Fan” ceiling vent/fan on ebay. When the doors arrived we traced the doors by holding them in place and cut out the holes with a jigsaw. Installation should have been simple but as this is our first time, we of course ran into some hang-ups- more on that later. We continued to frame out the cabin to prepare for wiring and insulation. After doing some research on electrical layouts we got serious about a plan and began to order lights and switches. Next we ordered all of the aluminum trim and sealant tape from Frank Bear as well as a “hurricane hinge”.


I called around to different sign companies, trailer repair shops and welding supply stores to get quotes for the aluminum sheeting. The Flying Wrench Services in Everett recomended that I try Pacific Welding Supplies in Bremerton. I drove out the next day to pick up 3-4x8 sheets and ordered a 4x12, which was a little overkill – a 4x10 would have been plenty long for our roof. We chose .032 inch thick “5052 aluminum”, a highly water-safe and corrosion resistant alloy. Inexpensive and Beautiful. To intall the trim we got some stainless pan-head screws from the hardware store.


There are basically two schools of thought when it comes to attaching the aluminum sheets- the float method, or the contact cement method. We heavily researched the options and decided that the float method would be far more forgiving to our lack of experience. So we caulked our screw and staple holes, and sealed the outside surface of our plywood to prevent rot caused by potential condensation build-up between the ply and aluminum – one of the main arguments for the contact cement method. We clamped the sheets to the sides and secured them with a few screws around the edge where the trim would eventually cover, and cut out the shape and the door hole using a router with a ¼' straight fush trim bit.


Next we installed the interior and exterior led strips and switches and buttoned up the inside with trim and finalized our shelving design in the galley. After installing the offset t-molding and weather seal to the hatch, as well as some 90 degree clamps, all that was left before our first dry run was the brake lights and turn signals. With a little research online at www.tnttt.com the wiring was pretty simple an straightforward using the kit that came with our trailer frame from Harbor Freight. Unfortunately I could not get one of the brake lights to function properly – it had power, and would come on with the brakes, but the turn signal and running lights failed to come on. After tearing apart the wiring and redoing it all twice, I finally traced the problem down to a bad ground. The design of the brake light puts the ground on the bolts that attach it to the frame, but the paint on the frame provided enough insulation to prevent solid grounding – a very simple fix that cost me several hours of frustration.


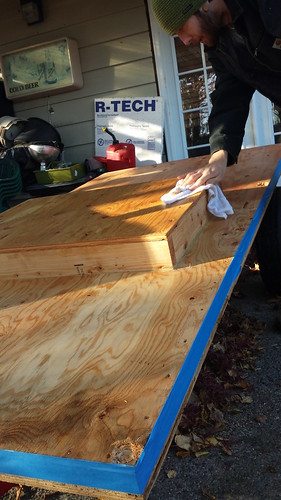
After we finished up running wire, we installed the interior walls which Steffy painted up real pretty, and then cut our high density foam padding to fit. The luan sheet I got for the interior ceiling just barely made the radius without breaking, although it did pop and crack a bit. With that done we cut a hole for the fan and installed the rest of the roof joists and insulation.


A bit of advise for those using the same doors – trace the opening using the flange for the inside rather than the door itself as it is about 1/4” larger on all sides than the door. After adjusting the holes, we had trouble with the included screws breaking before sinking more than halfway in. Pre-drilling the holes into the door helped a bit, but we still broke off a few more screws and had to slowly twist them out with pliers. We ended up getting our own stainless steel screws and spray painted them black to match, which worked great.


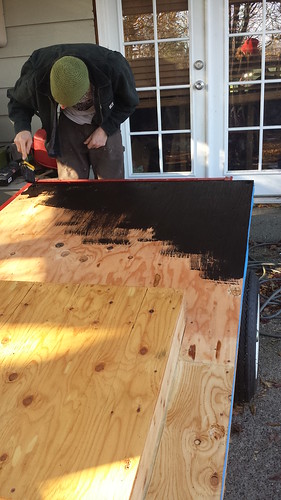
The luan and then aluminum sheeting went on the roof without any issues, and we began installing the trim, starting with the hurricane hinge for the galley door. This was our process:
1. Dry fit the trim, bending along the curves and cut to length
2. Pre-drill 2-3 holes per piece and install screws to hold in place for step 3
3. Pre-drill the rest of the holes
4. Remove trim and apply sealant tape
5. Attach trim with all screws
6. Remove every other screw and apply roofing/flashing sealant to each screw hole
7. Replace screws
8. Repeat steps 6 and 7 for the other half of the screws


Steps 6-8 might have been unnecessary, as the sealant tape claims to self seal the screws as they go in, but we live in Washington and were unwilling to take any chances when it comes to water safeness.


We ordered a Power Bright pure sine wave converter for 110v power, and a smart charger for shore power, and picked up a deep cycle marine battery. Dan at Stereotomy in Issaquah wired up our truck and the trailer with 4ga wire and an “anderson” break-away connector and set up our smart charger and converter with the battery. Our first camping trip with power went great. We used some scrap aluminum to cover the counter in the galley and a small accessory shelf for the stove.


No comments:
Post a Comment